Tuesday, August 30, 2011

how to monitor and control network traffic using Netbalancer

NetBalancer is an Internet traffic monitoring and controlling software that is available as a free and professional version.


NetBalancer’s core features include:
 Set download and upload speed limits for a process Manage priorities and limits for each network adapter separately Define detailed network traffic rules Group local network computers and balance their traffic synchronised Protect all settings and priorities with a password to prevent unauthorised changes Show all system processes with their in and out network traffic speed Show current connections for any process Show downloaded and uploaded traffic for any process since NetBlancer's start View overall system traffic as a graph Show network traffic in system tray Fine tune priorities (see Level Severity setting) Native 64 bit support for best performance Set global traffic limits


  • Set download and upload speed limits for a process
  • Manage priorities and limits for each network adapter separately
  • Define detailed network traffic rules
  • Group local network computers and balance their traffic synchronised
  • Protect all settings and priorities with a password to prevent unauthorised changes
  • Show all system processes with their in and out network traffic speed
  • Show current connections for any process
  • Show downloaded and uploaded traffic for any process since NetBlancer's start
  • View overall system traffic as a graph
  • Show network traffic in system tray
  • Fine tune priorities (see Level Severity setting)
  • Native 64 bit support for best performance
  • Set global traffic limits

  • The free version of the traffic shaping software NetBalancer is available for download at  developer website.

    If you enjoyed this post, make sure you subscribe to my RSS feed! 

    How to print secret messages using invisible ink


    If you enjoyed this post, make sure you subscribe to my RSS feed!  

    Friday, August 26, 2011

    Windows 7 like Taskbar on Ubuntu with Group Tab and Stacks | DockbarX


    People who are more used to Windows 7 taskbar like me often feel quite difficult working on Ubuntu. What if, we bring those features of wondrous Windows 7 Taskbar on Ubuntu taskbar.
    DockbarX is Gnome taskbar applet with grouping and group manipulation, Though the developer of this applet says he never wanted to make clone of Windows 7 but what all matters to us is productive functionality which DockbarX offers.
    Here are some screenshots:
    Ubuntu DockbarX Windows 7 Taskbar
    Not just Group tabbing but also, you get menu options on right click for pinning like Windows 7.
    DockbarX Windows 7 like Taskbar group tab

    How to install Windows 7 taskbar on Ubuntu

    Run following commands one after another in terminal.
    sudo add-apt-repository ppa:dockbar-main/ppa
    sudo apt-get update
    sudo apt-get install dockbarx dockbarx-themes-extra
    Then right click on current taskbar > Add to Panel > Select DockbarX Applet and press Add button.
    DockbarX preferences lets you customize behavior with Shortcut keys, Looks and Appearance with Themes and more!

    via : UbuntuLife
    If you enjoyed this post, make sure you subscribe to my RSS feed! 

    Tuesday, August 23, 2011

    How To Request A New IP Address From Your ISP

    1. Click Start
    2. Click run
    3. In the run box type cmd.exe and click OK
    4. When the command prompt opens type the following: *Press 'enter' after each new line.

    ipconfig /flushdns
    ipconfig /release
    ipconfig /renew
    exit


    5. Erase your cookies in whatever browser you are using.

    Frequently you will be assigned a new IP address when this happens. Sometime you will, sometimes you will not. If you are on a fixed IP address, this method will not work. If this works for you, you may want to save the above commands into a batch file, and just run it when you need it.


    via : HackPCOnline
    If you enjoyed this post, make sure you subscribe to my RSS feed! 

    A Simple Trick to Lock Your Computer

    Right click on an empty area of the desktop and choose 'new' then 'shortcut.' The create shortcut wizard will open.


    In the first text box, type '%windir%\\System32\\rundll32.exe user32.dll,LockWorkStation' and then give your shortcut an appropriate name on the next page, and hit 'finish.'


    You will notice that the shortcut you created has a blank icon. To select a more appropriate one, right click on the shortcut and hit 'properties.' In the 'shortcut' tab, click the 'change icon' button.


    Else u can simply press the \"window key + l\" to lock your computer.


    You can also use the following keyboard shortcuts with a Microsoft Keyboard or any other compatible keyboard that includes the Windows logo key and the Application key.


    via : HackPCOnline
    If you enjoyed this post, make sure you subscribe to my RSS feed! 

    10 Best Yahoo! Messenger Tricks and Hacks

    Yahoo! Messenger is an instant messaging program which is compatible with all Windows versions. While instant messaging is the focus of Yahoo! Messenger, there are several special tricks that can enhance the user experience.

    Here are my 10 Best Yahoo! Messenger Tricks and Hacks:

    1. Find invisible users on your Yahoo! Messenger list

    Want to find out someone who’s hiding from you? You can easily do so by going to Yahoo! Invisible Checker. All you need to do is type in the Yahoo! ID and the particular users status will be revealed.

    2. Invisible nickname on chat rooms

    Just go to edit profile and in the nick name type a (space character) on it just press Alt 0160 ( or ALT+255 ) and save it.

    Now go to any Yahoo! chat room and you’ll notice that your nick name is empty. [Alt+0160 is a keyboard shortcut for space]

    3. Run Multiple Instances of Yahoo! Messenger on same system

    Some of you might be having more than one Yahoo! ID would like to log in simultaneously. Here is an easy way to do it without installing any sort of software. You just have to edit the registry and voila there you go. Follow the instructions below:

    • Download the following -multiyahoo.reg and save it to your hard disk.
    • Double click on it.


    • The above dialog will popup, click ‘Yes
    • Start the yahoo messenger login with your first ID. Then again start another yahoo messenger by clicking on the messenger icon and log in with your second ID.This tweak works with all versions of Yahoo Messengers.


    4. Removing Ads from your Yahoo! Messenger

    If you are using Yahoo! Messenger 8.0, then you can disable ads by following the below steps:
    • First close the Yahoo! Messenger.
    • Save this .bat file and execute it. (Note: You won’t be able to enter the chat rooms if you use this patch.)

    The above fix doesn’t work for Yahoo! Messenger 9 Beta. Here’s a way to disable the ads in Yahoo! Messenger 9:
    • Make sure the Yahoo! Messenger isn’t running, if it is then just close it.
    • Now backup the following file C:\Program Files\Yahoo!\Messenger\Yahoo!Messenger.exe (create a new copy)
    • Download HxD hex editor.
    • Open C:\Program Files\Yahoo!\Messenger\Yahoo!Messenger.exe in the hex editor
    • Now go to the offset 295928 (in HxD: Search/GoTo)
    • Look at the right column and replace y from “y.m.s.g.r.a.d.s” with p
    • Save the file and close HxD.
    Note: This approach breaks Yahoo! Messenger’s terms of service.

    If nothing works try launching this file.

    5. Yahoo! Smiley Codes

    You can make use of all smileys including hidden ones in your messenger by using YEmotePLUS plugin.

    6. Creating Custom Profiles for Chat

    You can create custom profiles with different name, sex and other details from Yahoo! Create/Edit Profiles. You can use these for chat services only.

    7. Change the Yahoo! Messenger Title Bar

    You can change the text that appears at the very top of the Yahoo! messenger window by editing the ymsgr.ini file.

    1. Go to Program Files\Yahoo!\ and open ymsgr.ini.

    2. Then at the end, type this:

    [APP TITLE]
    caption=YOUR TEXT

    3. Change YOUR TEXT to whatever you want it to say. Then save the file and close messenger. When you restart messenger you will see your new message.

    8. Online Status Changer and Manager

    HyperIM is currently the best status changer & manager for Yahoo! messenger available at present. You can download it here.

    9. Access Yahoo! Messenger Chat archives while offline

    You can access your Yahoo! chat logs using Yahoo! Message Archive Decoder. It reads Yahoo! Messenger archive files (.dat files) and presents them in a format that you can read. It decodes the message archive without logging in (offline mode and no passwords required). You can download it here.

    10. Retrieve Yahoo! Messenger Display pictures

    Y! Display Pic will retrieve Yahoo! users even if they are offline or invisible. You can download it here.

    via : HackPCOnline
    If you enjoyed this post, make sure you subscribe to my RSS feed! 

    Thursday, August 18, 2011

    How To Quickly Insert Trademark, Registered And Copyright Symbols In Word 2010

    Today, I am going to tell you how to quickly insert Trademark, Registered and Copyright Symbols in Microsoft Word 2010 Document using Keyboard shortcuts. Just follow the following simple steps:
    1 – Launch Word 2010 document.
    2 – To Insert Trademark ™ Symbol Type (TM). Or Press Alt Key, Type 0153 and then release Alt Key (NumLock must be ON to write Numeric value)
    3 – To insert Registered ® Symbol Type (R). Or Press Alt Key, Type 0174 and then release Alt Key (NumLock must be ON to write Numeric value)
    4 – To insert Copyright © Symbol Type (C). Or Press Alt Key, Type 0169 and then release Alt Key (NumLock must be ON to write Numeric value)

    via : MicrosoftFeed
    If you enjoyed this post, make sure you subscribe to my RSS feed! 

    Wednesday, August 17, 2011

    How To Embed Video or Audio Into Word 2010

    Microsoft Word 2010 has got an excellent feature to embed a video or an audio into its document. Today I am going to tell you how to use that Word 2010 feature. Following steps will lead you to this feature:
    1 – Launch Word 2010 document.
    2 – Go to Insert Tab > Click Object under Text group.

    3 – After clicking Object, a Dialog box will open. Go to Create from File Tab in the Dialog box.
    How To Embed Video or Audio Into Word 2010
    4 – Then Select a Video or an Audio you want to embed by clicking Browse Button and also Check Link to File and Display as Icon Checkboxes. In the end, click OK Button to save the changes.
    How To Embed Video or Audio Into Word 2010
    5 – Now you can see Video or Audio Icon in your Word 2010 document. If you want to open that Video or Audio, just double click on the icon.
    How To Embed Video or Audio Into Word 2010

    via : MicrosoftFeed
    If you enjoyed this post, make sure you subscribe to my RSS feed! 

    How To Perform Basic Mathematical Operations In Word 2010


    If you have to perform basic mathematical operations while working on Word document, you don’t need to look for calculator to perform those simple tasks. Microsoft Word 2010 has the feature to perform basic mathematical operations. Following steps will lead you how to use that Word 2010 feature:
    1 – Launch Word 2010 document.
    2 – Go to Insert Tab > Click Quick Parts > Select Field
    3 – After selecting Field, a Dialog box will appear. Select =(Formula) under Field names and click Formula Button from Dialog box.
    How To Perform Basic Mathematical Operations In Word 2010
    4 – After Clicking Formula Button, a new Dialog box will appear. Select the mathematical function you want to perform from Paste Function Drop down menu.
    How To Perform Basic Mathematical Operations In Word 2010
    5 – Now selected mathematical function from Paste Function Drop down menu will appear in the Formula Field. Enter the values on which you want to perform selected mathematical function in the Brackets of mathematical function and click OK Button. For example SUM(3,4)
    How To Perform Basic Mathematical Operations In Word 2010
    6 – Now you can see the calculated value of selected mathematical operation in your Word 2010 document.

    via : MicrosoftFeed
    If you enjoyed this post, make sure you subscribe to my RSS feed! 

    Record Your PC Screen for Free with MS Expression Encoder


    Microsoft Expression Encoder is an application that allows you to record your screen, and also audio. This can come in handy for those who wish to record instructional videos, or if you want to record yourself playing a video game, or pretty much anything else. You won’t need to enter a product key. If you’re asked for one, you can skip that page and simply continue.
    To get started, you need to first download a copy of Microsoft Expression Encoder. You can do this by going to this link. This will take you to the Microsoft download center, and all you need do is click on the download button. You may be taken to another page where it will prompt you to download the file. Just go ahead and save it to you computer. Once the file has downloaded, you simply have to click on it to begin the installation process and follow the instructions. During the installation process it will not only install the Microsoft Expression application, but also a screen capture codec, that will allow you to capture the screen and audio from your computer. It will also enable you to save the video you’re recording into a file format you can use later to edit the video.
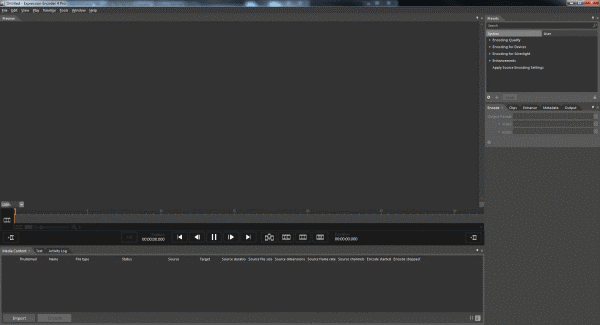
    Microsoft Expression Encoder Screenshot
    One you’re done installing the program, you should be able to find it listed as a new program in your start menu. It will be called Expression Encoder Screen Capture or something similar. When the program runs, you may see an informational screen saying the program is limited to only ten minutes of screen capture. This is because this is the standard version of the software, so if you want to record for more than ten minutes, you’ll have to split your video into sections and join them again later. Most instructional videos are less than ten minutes anyway, so this shouldn’t be too big of a deal.
    To get the best out of the software, you should probably alter some settings before recording. So click on the “gear” icon, which will open up a settings screen. The best frame rate is about 30fps, so just change that on the drop down menu. Also change the quality to 100. Also if you’re going to be using a microphone during the recording, click on the audio tab, and select the microphone you’re going to be using, and choose a bit-rate of 256.
    To start a recording, just click on the red record button. You will get a window on your screen that can be resized to how you want. You can record either the entire screen or just a portion of it. Once you’re ready and happy with your screen size, go ahead and click on record once more to start your recording. Click on stop when you’re done.
    Once you have finished a recording you will be presented with another screen where you can choose to open your recording in Expression Encoder 4 for encoding. Choose an output directory on the right hand side of the screen – your desktop might be a good place. Click on file, and then encode, and your video will be created. The standard video type is a WMV file, so you can view your video in Windows Media Player. That’s all there is to it really.

    via :  GHacks

    How to get the use of your number pad back in Ubuntu


    Number pad not working in Ubuntu? I feel your pain. After an upgrade to Hardy, my numberpad stopped working in Ubuntu Linux. I decided to look around in the Keyboard preferences and found my answer. I found that mousekeys was enabled. To get the use of my num pad back, all I had to do was disable mousekeys.
    So, here’s the quick step by step to enable the number pad:
    Step 1: Click on System Menu
    Step 2: Mouse over on Preferences
    Step 3: Click on Keyboard


    This brings up the Keyboard preferences window.
    Step 4: Click on the Mouse Keys tab
    Step 5: Disable the “Allow to control the pointer using the keyboard” checkbox.
    Step 6: Click close and ensure that your Num lock is on.
    At this stage you should have full use of your number pad.
    Update: There is a shortcut key to toggle Mousekeys also. You can do this by pressing the SHIFT and Num Lock keys together.

    via : RDavid
    If you enjoyed this post, make sure you subscribe to my RSS feed! 

    How to Set / Apply Video Clips as Wallpaper in Windows 7 Desktop Background

    DreamSceneSeven is a small application and allows you to change desktop wallpaper to video from context menu. It is extremely easy to use and once installed you can perform applying video clips as wallpapers in a single click.
    After downloading the package you have to execute it and install DreamScene. Once this is done, you can select video clips and set it as desktop background wallpaper from the context menu.
    videos can also be paused from the context menu. The present version of this application allows video with extension .mpg and .wmv to be applied as wallpapers. There are lots of video that can be applied from DreamScene gallery.
    One thing that you have to take care of before using DreamScene is enable the “Show translucent selection rectangle” from the performance control tab. If it is disabled you will get an error message asking to enable it. In case you get this message in spite of the option being enabled, just disable it and re enable again.


    DreamSceneSeven works perfectly but applying a video wallpaper increases load on system. So go for it only if you have a system with large mount of ram or a good graphics card. Trying it on lower end systems may hamper overall performance.
    This was dedicated to Windows 7 but if you are still sticked to XP then try out DreamScene for Windows XP.

    via the:  Blogsolute